
Il libro definitivo per imparare Angular, con esempi, codici e l'esperienza che serve per essere efficaci nello sviluppare siti, dashboard CRUD o web-app mobile (Raccomandato con un punteggio di 5 stelle su Amazon)
Info sul libro + Codici e demo delle esercitazioni Libro stampato Kindle
C'è una differenza tra programmare e progettare un software: il design. In questo libro viene mostrato il processo per arrivare ad un design semplice e manutenibile attraverso i design pattern
Info sul libro + Codici delle esercitazioni Libro stampato
KindleWhen we have to create a new front-end project the wrongest thing we can do is to immediately develop the code. The most common errors are 3:
- the project does not match to what the client wanted
- the project is not usable
- the project is not aesthetically beautiful
To overcome all these problems we can create a mockup, that is a graphic representation of the project to show to the various stakeholders before even writing a line of code. And even if we’re not designers, creating a mockup is something everyone can do.
Introduction
In this article we will see what are the techniques and practical tools to create a mockup, while in the next article we will understand how to proceed to create an optimal User Experience and an optimal Design.
Prototype and mockup: how to create it in a few hours and make it interactive
How long and what tools and techniques are needed to create a new web project?
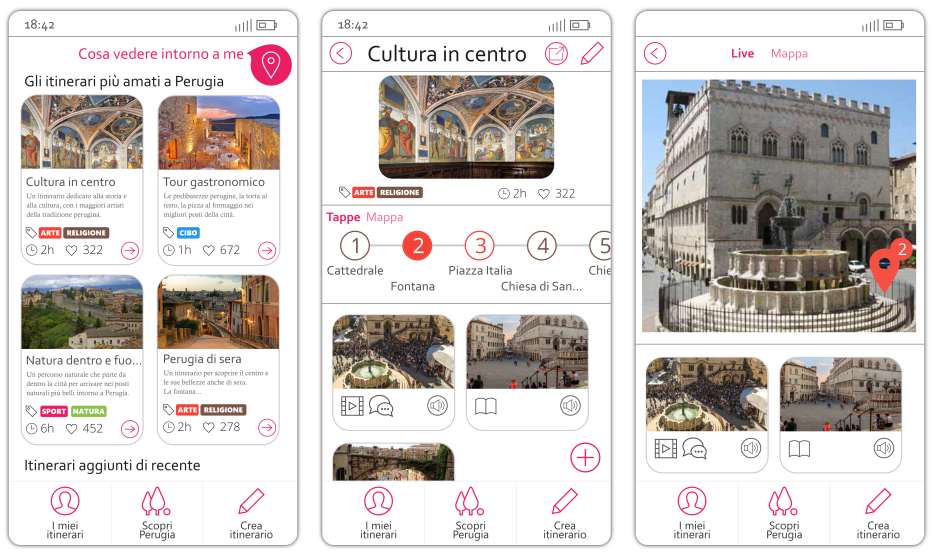
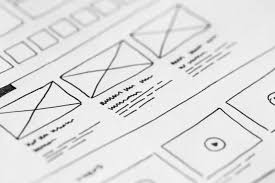
The image above shows a web app, or rather what a web application will be. In fact, not even a single line of code was written. The first step to have a clear idea about a product and to create a quality product is to switch from the idea in our mind into the actual images.
This way we make real what was still in our head only.
The images of how the web or mobile application will be are called mockups and have several advantages:
- They are quick to generate
- They are close to the graphics of the final product
- They allow the design and the development team to have clear ideas about what to do
- Since they can be made interactive, when we show them to the end user we can get UX feedback and design in a very short time
The feedback received from the user in this phase is the greatest value we can have: through the feedback we can create a new version of the mockup and better meet the needs of the end user with ridiculous times and costs compared to the actual development.
Delegating a designer to create the mockup is the obvious choice, but it’s often not possible. Moreover, it’s important for non-designers to know how to create a mockup.
But if we’re not designers, how complicated is it to make a mockup?
In this first part we will see the techniques and tools to make a mockup, while in the following articles we will understand how to develop the mockup maximizing Design and UX.
Step 1: Inspiration
Even experienced designers need to be inspired to create their designs. If we are developers, taking inspiration from other designers’ external work can help us a lot.
To explore existing project mockups, I recommend the following websites:
Dribble

This is a generic designer site, but by searching using queries like “mobile app” or “mobile mockup” or “web” or “dashboard” we can find very elegant designs: https://dribbble.com/search?q=Mobile+app
ThemeForest

This site is dedicated exclusively site templates and some are really beautiful. We can get inspired for the creation of a new project:
https://themeforest.net/
Step 2: Sketch
Before creating a detailed mockup we need to have a clearer idea. If in fact creating a mockup is a quick operation, creating a sketch of our application with paper and pen is even faster.
In this phase I advise not to be precise, but to obtain a version that meets the useful features for the end user.
After iterating on the first drafts, we can move on to the mockup.
Step 3: Introduction to the mockup
At this point we can create the mockup. We will see the techniques to create the mockup and in the software tools to speed up the mockup creation.
What techniques are needed to create a mockup?
We can create mockups with various levels of detail. If we want to be
pixel perfect, then we will turn to a vector graphics software, like Figma (web), Sketch (only on Mac) or inkscape (free, portable and multi-platform).
When we need to create a mockup with standard components, we can instead use a software with ready-made component libraries that, through drag & drop, allows us to create pages with buttons and images in no time (eg Mockups or Figma).
Personally, I prefer the first road, which requires more practice but is also more flexible as it allows us to achieve anything we imagine.
Since Figma is useful in both cases and is free, we will use this tool in the following examples.
Before starting to create, let’s try to get familiar with the tool.

- Let’s go to the Figma website
- The let’s register. Immediately after signup we will see the screen above
- Confirming the email we will see instead some example projects, as shown below:

To get familiar with the tool we can open the “Sample file” project and start browsing the project.
Navigation
To navigate in a project just use the mouse wheel:
- Moving it we scroll the worksheet (or canvas) vertically as if it was a web page
- Holding SHIFT we scroll horizontally
- Pressing CTRL we can instead control the zoom, useful for moving quickly to even distant parts of the canvas.
Let’s continue to explore the project, which is indeed the mockup of an application.
Step 4: the techniques to make a mockup
To make a mockup, regardless of the software we’re going to use, we will have to learn these tools:
- Rectangles and rounding to create shapes and structures that will then be the components of our application
- lines used as separators and to create more complex shapes
- Images and icons to characterize our application
- Groups to move and resize sets of simple shapes as if they were a single object
- Alignment to create a clean and elegant design
- Interactivity to evaluate the user experience of application as if it was the real result, especially in the presence of customers/end users.
We will learn these tools and how to use them with the Figma software in particular.
Rectangles and rounding
The most common object we will use in our mockups is the rectangle. We will use it both directly as a component part of the application, and as a base graphic to create more complex objects.
In the case of a mobile application I always like to have a base reference, a skeleton of a mobile phone:
- To start, use the rectangle tool at the top left corner:

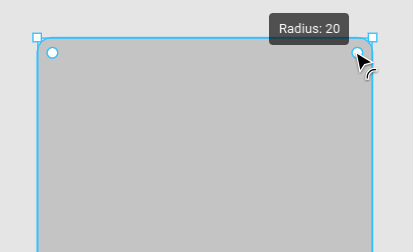
- then draw the rectangle and add some rounded edges with the circle in top right of the newly drawn rectangle:
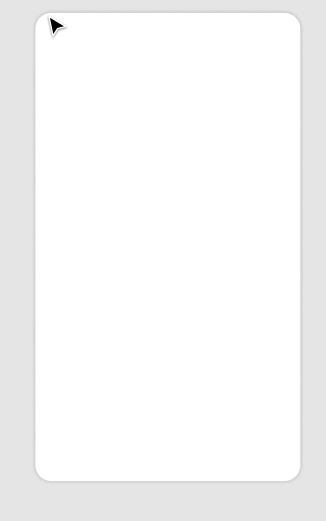
- Let’s change the background to white and add a shadow using the bar on the right:

Rectangles and rounded rectangles are the basis for the graphic structures of each desktop or mobile application.
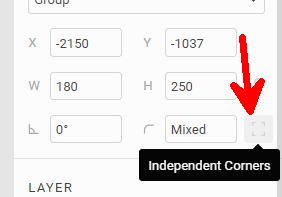
As a final note, we can change the rounding of each corner separately using the properties of the bar on the right:
Lines
The next tool is about the lines:

As an example we draw a line to highlight the status bar of our phone:

In every vector graphic tool , I can force the horizontal direction of the line. In Figma you get a straight line by holding down the SHIFT key while drawing.
We can change the curvature of the line or add points to break the line with the tools at the top left (visible by clicking on a line):

Importing images and icons
Images and icons will strongly characterize a mockup, which otherwise would seem impersonal. In Figma we can use copy / paste from any application and find the image copied by pressing CTRL + V directly in the browser. Furthermore Figma also supports SVG icons.
On the site http://iconmonstr.com we will find many icons in SVG format and it will be enough to copy the code to have them available in vector format on Figma.
Let’s try, for example, to complete the reference of the mobile phone skeleton including the battery, wifi and clock icons:
- We are looking for “battery” and we click on an icon at will of a battery. Then we press down on “I agree …” and Embed:
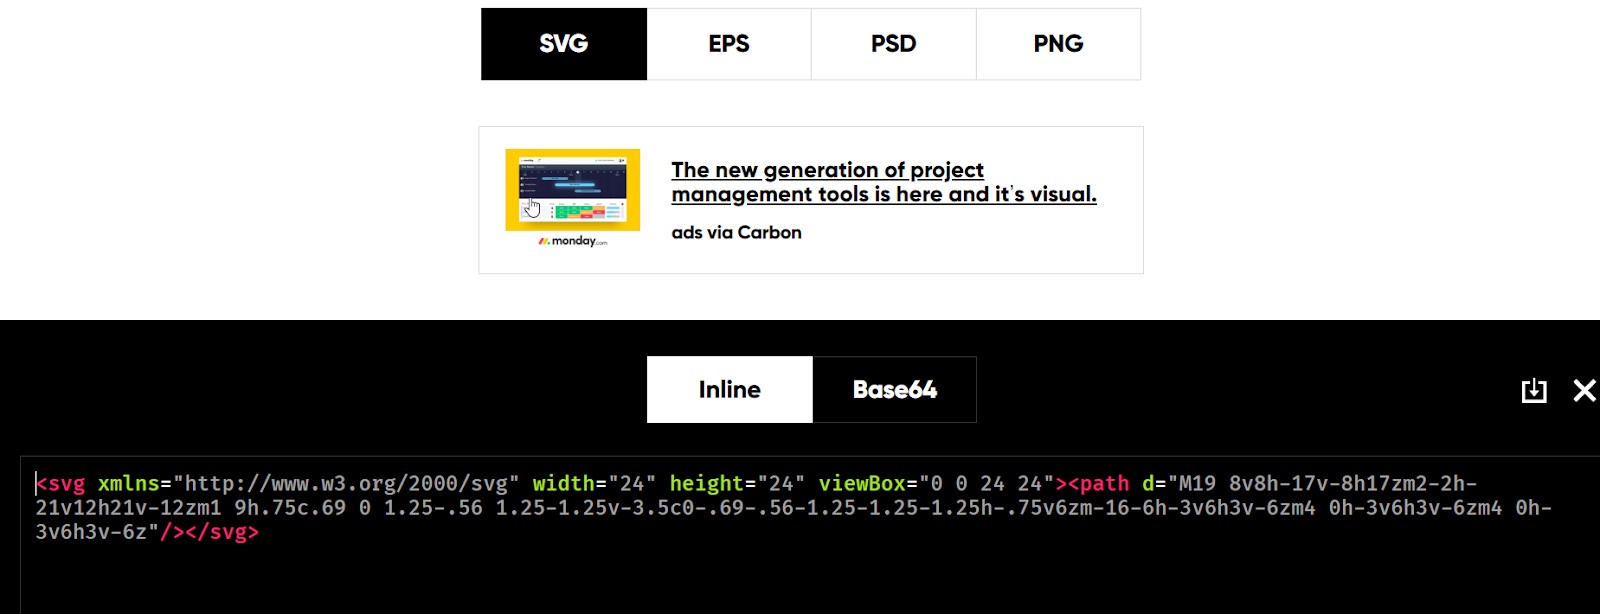
- We select all the SVG code and paste it directly into Figma to see the icon:
- We can proceed similarly for the other icons, obtaining the complete bar:

Groups
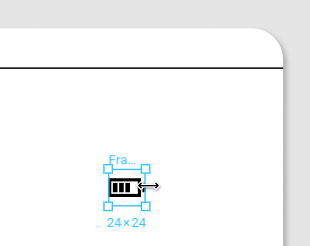
After pasting the icons , you will have noticed that every icon is embedded in a Frame. In Figma the frames are groups of objects.
We can create new groups by selecting multiple objects and clicking the right button> Group Selection

A group can be moved and resized as a whole. The result is that the elements inside are scaled appropriately. To resize a group just press the k button.
A group is also useful because we can duplicate it with CTRL + D and obtain an identical object:

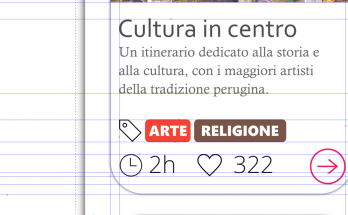
In the final mockup of the application shown at the beginning of the article I duplicated the card several times and then modified only the image and the text inside:
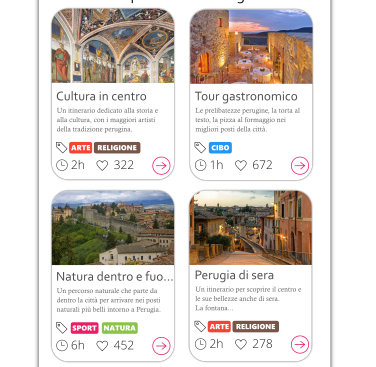
In this part of mockup I used all the tools seen so far: rectangles, images, icons and groupings.
As a final note, we can select a group or an object inside the group by double click or by using the left side menu:
Alignment
When creating a mockup it is a good idea to respect some basic design rules. We will see in the next article how a front-end developer can apply the best rules, but in the meantime I anticipate that the alignment plays a fundamental role.
If you have noticed, the application itself always shows guides to align the objects with respect to others. There are also buttons to align groups of objects at the top, bottom or center:

Export
It’s time to export our project. To do this we create a group and, in the right sidebar, we click on the + next to the section Export:

We can choose which format to export (PNG, SVG, …).
Interactivity
After creating several pages of our application, it would be nice to bring our project to life by making it possible to click on a page and go to the next page, almost as if the application was real.
In Figma there is a particular type of group, called frame. A frame can be used to make an application interactive.
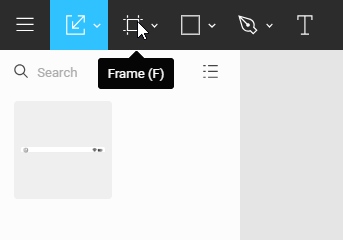
To add a frame, click on thebutton Frame at the top left:
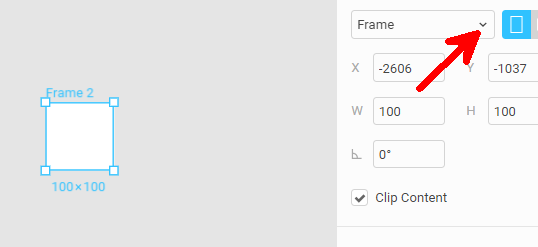
From the properties on the right we can change the frame size to match a real device.
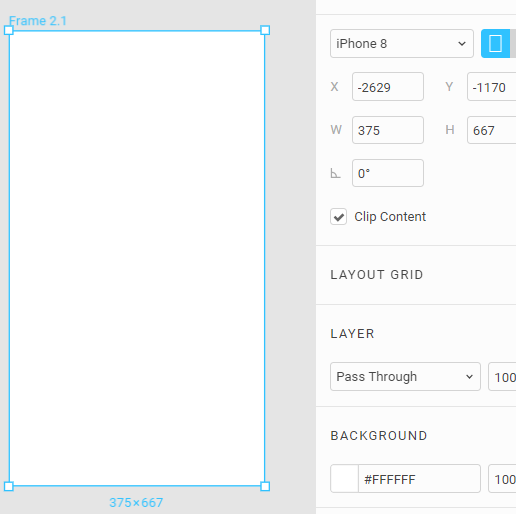
This is the result with an iPhone 8:
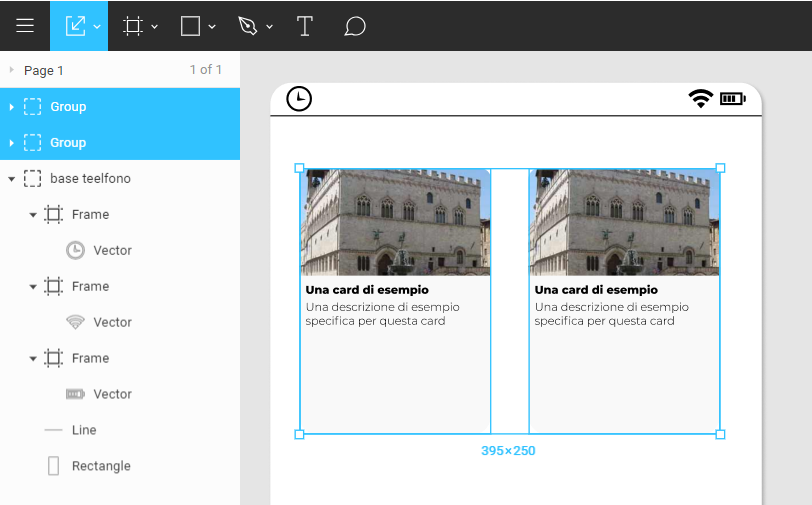
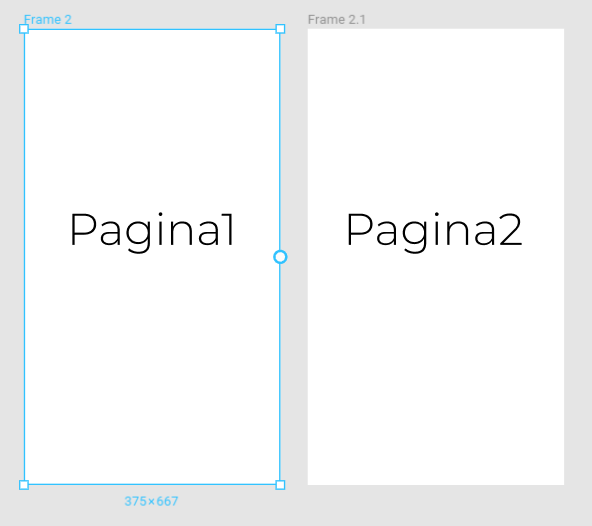
Within a frame we can add all the objects that represent a page of our application.
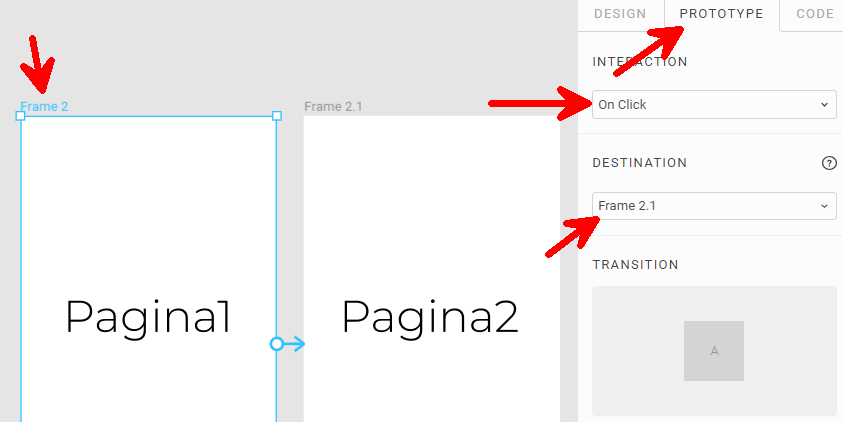
Let’s try to create two frames and click on the label of one of the two (Frame 2 in the image):
Still from the bar on the right, if we choose the tab Prototype we can set that by clicking on a frame we will move to the next one:
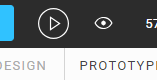
To try our mockup live we can press thebutton Play at the top right:
Conclusions
In this chapter we have seen what a mockup is and how it can help us to visualize a new application even before developing it.
We have also learned that the tools to create mockups are few and involve the use of rectangles, images, icons. Figma is an online software that has these tools.
As anticipated in the introduction, knowing how to create a mockup is not enough. This is why in the next articles we will see the basics of UX and Design that a developer must have to create a mockup aesthetically pleasing and usable.
Il libro definitivo per imparare Angular, con esempi, codici e l'esperienza che serve per essere efficaci nello sviluppare siti, dashboard CRUD o web-app mobile (Raccomandato con un punteggio di 5 stelle su Amazon)
Info sul libro + Codici e demo delle esercitazioni Libro stampato
Kindle
C'è una differenza tra programmare e progettare un software: il design. In questo libro viene mostrato il processo per arrivare ad un design semplice e manutenibile attraverso i design pattern
Info sul libro + Codici delle esercitazioni Libro stampato
Kindle